
![]()
A bean is a basic element of the issues management system. It stands for an issue, a thing that needs to be done, a project that requires processing or developing of at least one file. The bean represents your intention, an outcome you want to achieve by completing the bean. The bean collects files connected with the issue; it helps to organize them; it provides the issue with such attributes as: name, status, outcome, and context.
Beanflows is not meant to edit, modify or create files. It is only a container and an organizer. Each time you want to edit or develop files included in the bean, you need to use applications dedicated to these purposes.
Work to create your first bean now… Doing the exercises below, you will learn how to grow a bean and how to set its attributes, such as status and outcome. You will also learn what is the flow folder structure.
First bean
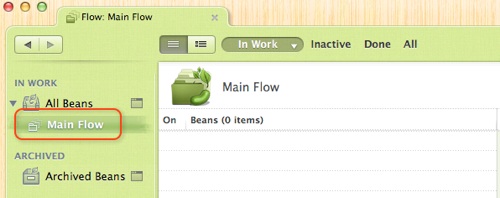
Click “Main Flow” on the navigation bar.
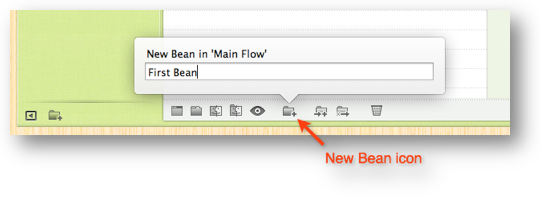
Click the “New Bean” icon under the table, write “First Bean”, press Return.
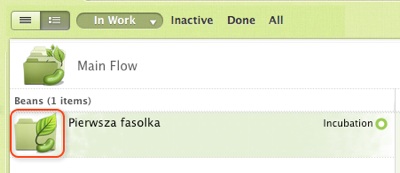
Click the “detailed list” icon on the green filter bar.
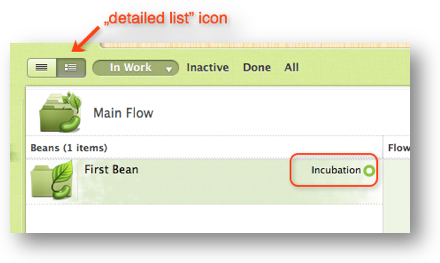
Notice that the new bean status is “Incubation”.
Bean in the Finder
Now you can see the directory structure.
Click the “Main Flow” icon.
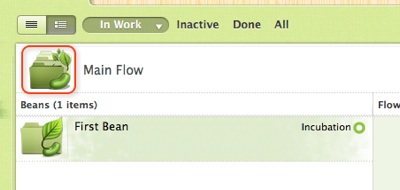
The Finder window will appear.
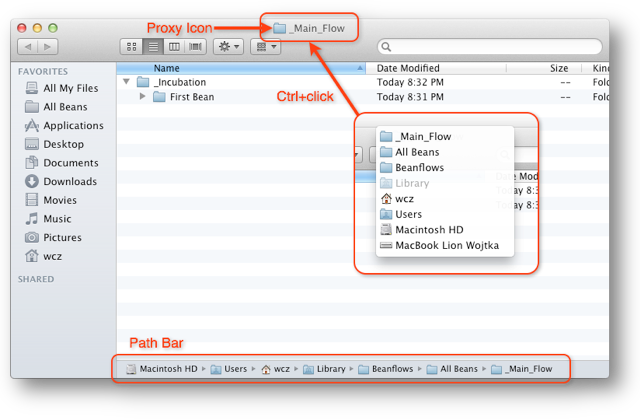
Check where the bean folder is located using one of the following ways:
- Ctrl+click on the directory proxy icon.
- Click “View“ menu -> “Show Path Bar“ navigate here. If any names are not full, widen the window or hover the mouse cursor along the path elements to see the full names.
Have a look at the path ~/Library/Beanflows/All Beans/_Main_Flow
Notice that the “Beanflows” root directory is located in the Library.
Now, translate “First Bean” into Polish, in the Finder: select the line, press Return, write “Pierwsza fasolka”, press Return.
Bean Tab
Switch to Beanflows. Open the bean: click twice on the green folder icon with a sprout.
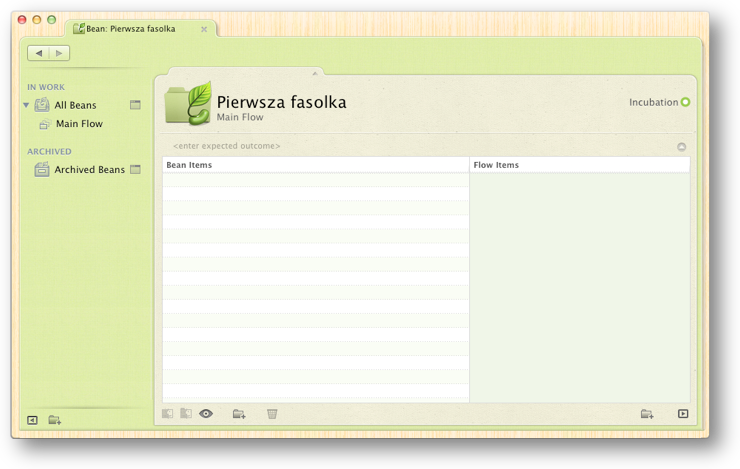
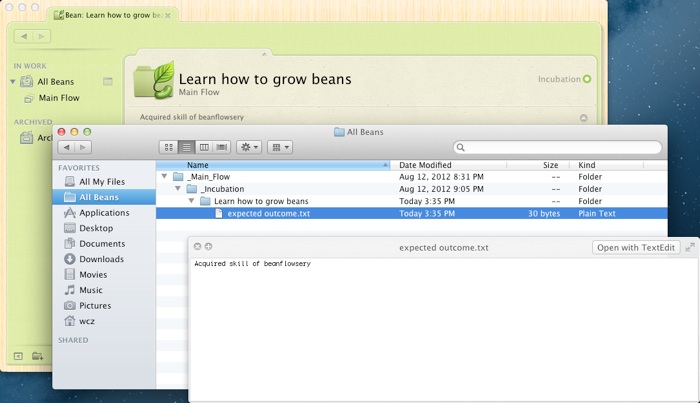
You will see the Bean Tab. The upper part contains the bean attributes: icon, bean name, flow, status, and the place for the expected outcome. In the middle you will see two fields : “Bean Items” and “Flow Items”. “Bean Items” will show the bean folder contents. “Flow Items” will show the files and directories which are shared by all beans in the flow (contents of _Flow_Items directory).
Press the “Pierwsza fasolka” text, delete it, write “Learn how to grow beans”, press Return.
Expected Outcome
Click twice on the “<enter expected outcome>” text, write a text, e.g. “Acquired skill of beanflowsery” and press Return.
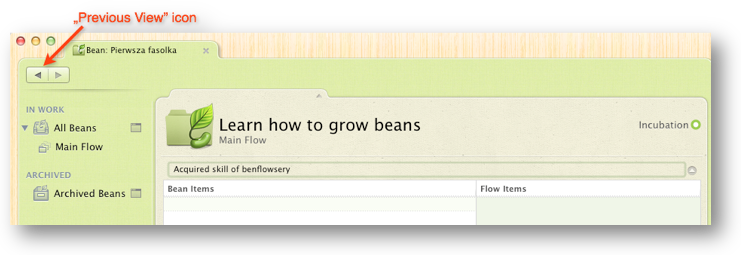
Close this view by clicking on the “Previous View” icon.
Notice that the file “expected outcome.txt” appeared in the Finder.
Bean Statuses
It was already mentioned that the bean stands for an issue, a thing that needs to be done, a project that requires processing or developing of at least one file.
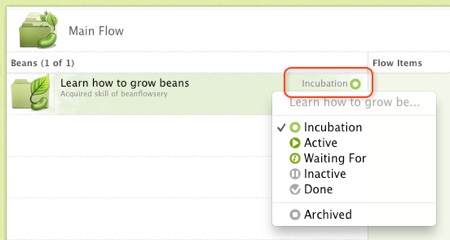
Bean statuses represent the stages of the process of outcome achievement: sowing, growing, shaping, maturing, and harvesting.
There are 6 statuses:
 Incubation – data/information collection, gathering.
 Active – work on the bean files; bean files are edited in dedicated applications.
 Waiting For – indicate situation in which you can’t proceed with the work on the bean until certain event will happen.
 Inactive – the bean not to be used for some time; it is not taken into account while choosing issues to work on.
 Ready – the finished bean. ‘The harvest time’, the use time of an outcome, of a created file(s).
 Done – the done, harvested bean. It could be needed yet so it stays in the flow but is filtered out.
 Archived – a no longer needed bean.
Beanflows determines the bean status according to its location in the flow directory structure. Done beans are stored in the _Done folder, inactive beans in the _Inactive folder, etc. When you set the bean status in Beanflows, the program will transfer it to the right folder. If you transfer the bean to a different folder in the Finder, Beanflows will show the right status.
Watch the bean statuses in Beanflows. Click on status name or icon.
Now set various statuses and see what happens to the main flow folders in the Finder.
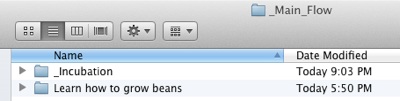
1. Set the Active status
Notice that the “First Bean” directory has been transferred to _Main_Flow in the Finder.
2. Set the Inactive status
Notice that there appeared _Inactive directory in the Finder. The “Learn how to grow beans” directory has been transferred to the _Inactive directory.
At the same time in Beanflows: has the bean disappeared? The view filter “In Work” shows only the beans with “Incubation”, “Active” and “Waiting For” statuses. Set the filter to “All”.

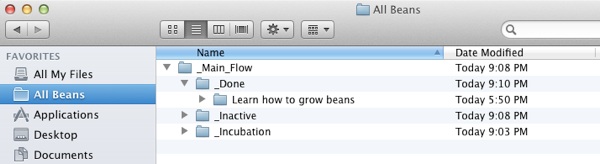
3. Set the Done status
Notice that there appeared _Done directory in the Finder. The “Learn how to grow beans” directory has been transferred to it.
4. Set the Archived status
The bean has disappeared from the Main Flow table in Beanflows. Click “Archived Beans” on the navigation bar. You can find the bean here.
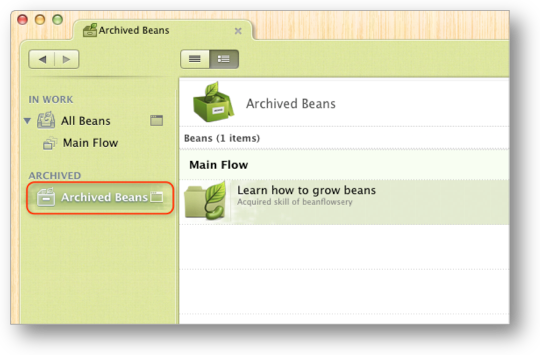
Beans that are no longer needed are gathered in the archive. If you need more space on your computer disk, you may either delete the archived beans or move them to an external disk.
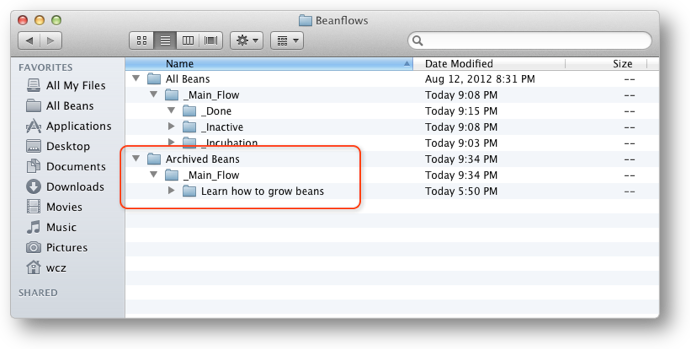
Notice that there appeared “Archived Beans/_Main_Flow” directory in the Finder. The “Learn how to grow beans” directory has been transferred there.
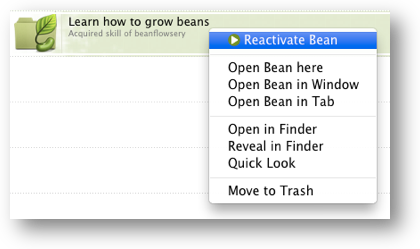
5. Reactivate the bean
Ctrl+click on the bean icon, choose “Reactivate Bean”.
Set bean attributes in the Finder
Now, the last exercise.
Make use of the possibility to set bean attributes directly in the Finder.
In the Finder, transfer the “Learn how to grow beans” from one folder of the Beanflows directory to another a few times:
- Transfer the bean to the _Incubation folder,
- then move it to the _Inactive folder,
- then move it to the _Done folder,
- then move it to the Archived Beans/_Main_Flow folder,
- finally, transfer it to All Beans/_Main_Flow folder.
Watch how Beanflows recognizes the transferred bean changing status on the Portfolio Tab in the Beanflows.
What next?
Now, after you’ve completed this tutorial, we encourage you to transfer your files into Beanflows directory and start benefiting from using the Bean metaphor.